Creating a lush, healthy lawn starts with understanding how to lay lawn turf correctly. While many homeowners attempt DIY turf installation, the difference between a patchy lawn and a long-lasting one often comes down to proper preparation and technique. In Essex, a lot of homeowners choose to work with experienced turf layers in Essex, especially when they want the job done quickly and to a professional standard. Many people also prefer using companies like Turf Supplies Essex, known for their affordable natural grass turf delivery and installation services across Essex and the surrounding areas.
Get in touch on WhatsApp and request your free quote :
Whether you’re refreshing your garden or starting from scratch, installing turf is one of the quickest ways to transform an outdoor space. This guide takes you through everything you need to know—from preparing your ground to maintaining your new lawn—so you can achieve the best possible results.
Why Proper Turf Laying Matters More Than You Think
Laying turf might look simple at a glance, but every step from soil preparation to post-installation care affects the long-term health of your lawn. A well-laid lawn should root deeply, stay even across all areas, and maintain a consistent colour throughout the year. Poorly installed turf often leads to:
- Uneven or sunken patches
- Poor drainage
- Dead or yellowing sections
- Weed invasion
- Long-term maintenance issues
Taking the time to understand the process ensures your investment pays off, especially if you’re aiming for a clean, professional finish.
Step 1: Preparing Your Garden Properly
Before you learn how to lay lawn turf, the groundwork—literally—must be correct. Good soil preparation is the foundation of a healthy lawn.
Clear the Entire Area
Remove everything that may interfere with turf growth:
- Old grass or weeds
- Stones
- Roots
- Garden debris
- Uneven clumps of soil
Using a spade, turf cutter, or hoe makes clearing easier.
Level the Soil Thoroughly
An uneven surface doesn’t just look messy—it affects drainage and creates soft spots.
To level properly:
- Break up compacted soil
- Remove bumps
- Fill dips with topsoil
- Ensure a smooth, even gradient
Pay attention around pathways, fences, and edges, as these often collect extra soil.
Improve the Soil Quality
Healthy grassroots depend on fertile, well-structured soil.
Mix in:
- Organic compost
- Fresh topsoil
- Soil improver
If your soil tends to be heavy or sticky, break it up to improve drainage. If it’s sandy or dry, add compost to help it retain moisture.
Firm and Rake the Ground
Lightly tread (heel-in) the soil or use a roller, then rake it again to achieve a smooth, slightly loose surface.
This gives the turf a perfect base to bond with.
Step 2: Apply a Pre-Turf Fertiliser
Before laying turf, it’s a good idea to add a pre-turf fertiliser. This helps the roots establish quickly and strengthens the lawn during its first few weeks.
Spread it evenly and rake it into the top layer of soil.
This simple step significantly improves long-term growth.
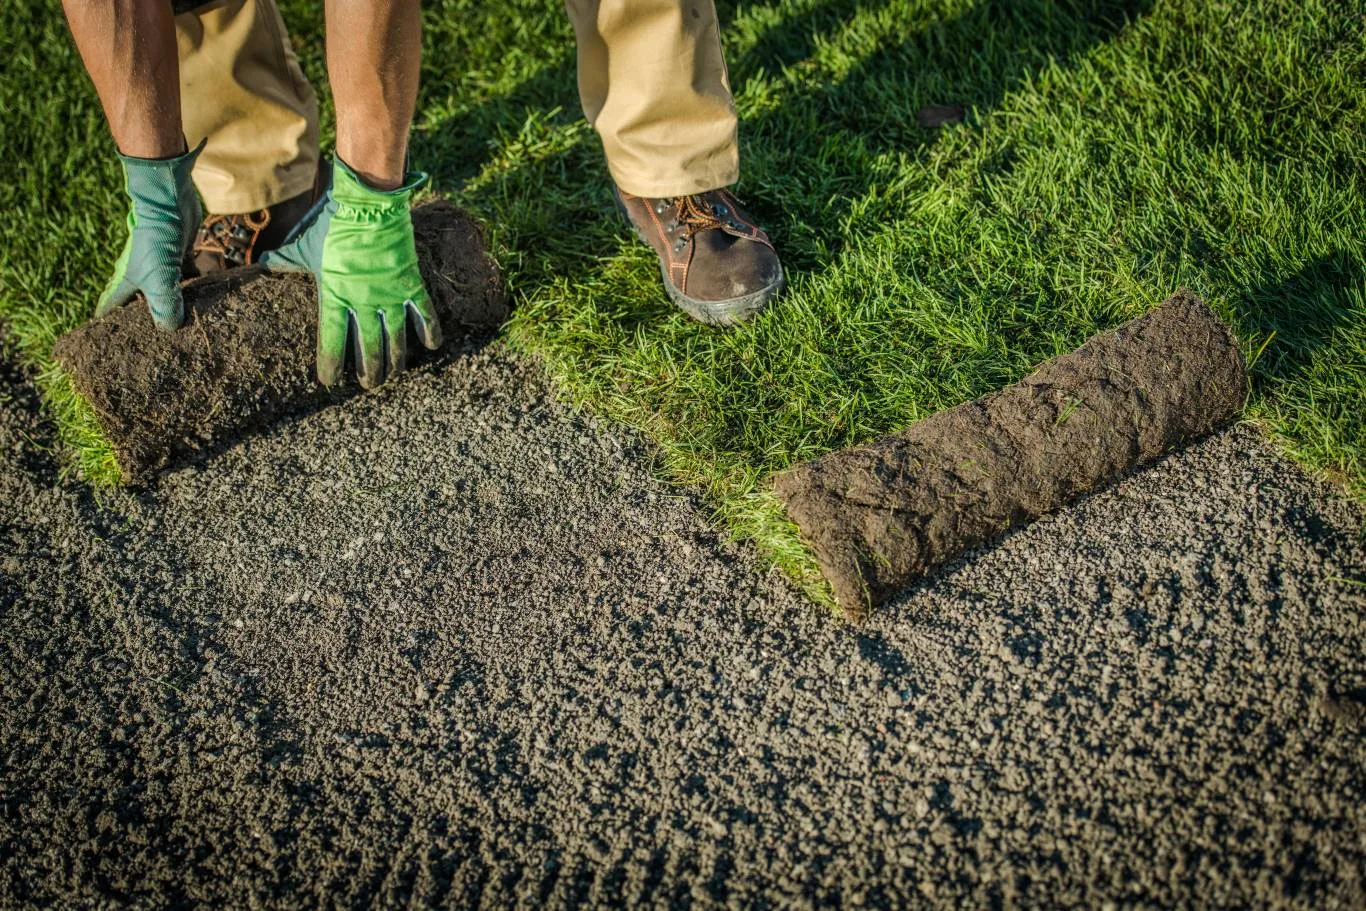
Step 3: Start Laying Your Turf the Right Way
Now we come to the part most people look forward to—actually laying the turf. Even though it’s exciting, it’s worth taking your time to get every roll placed neatly.
Start Along a Straight Edge
Begin against a driveway, patio, fence, or another straight border.
This helps keep the entire lawn aligned.
Fit the Edges Neatly
Press edges together firmly.
There should be no visible gaps because these dry out quickly and create yellow lines.
Stagger the Joints
Lay each roll in a staggered pattern, similar to brickwork.
This strengthens the lawn and prevents joint lines from showing.
Avoid Stretching the Turf
Never stretch the rolls to fill a space.
Instead, trim a piece to fit the gap—this ensures consistent density.
Use Boards to Work On
Place planks or wooden boards over the newly laid turf when stepping on it.
This prevents sinking, shifting, and imprint marks.
Trim Excess Turf Carefully
Use a sharp knife to cut around shapes such as flower beds, pathways, or curved borders.
Step 4: Water the Turf Immediately
Freshly laid turf must be watered straight away.
A deep soak ensures the roots attach firmly to the soil.
During the first two weeks:
- Water every day (unless there’s heavy rain)
- Make sure all areas stay moist
- Avoid stepping directly on the turf
The lawn is establishing itself during this period, so consistent moisture is crucial.
Step 5: The First Few Weeks of Aftercare
Looking after your new lawn properly will determine how well it develops.
Watering
Keep the soil consistently moist.
Dry patches can cause turf edges to lift or turn yellow.
Mowing
Your first mow should only happen once the grass reaches around 5–6cm.
Set your mower blades high and only trim a small amount.
Avoid Heavy Use
For at least the first month:
- Avoid placing furniture
- Keep children and pets off the lawn
- Don’t walk on it unnecessarily
This prevents footprints, dips, and root disturbance.
Step 6: Ongoing Lawn Maintenance
Once your lawn is established, maintaining it becomes much easier.
A few key habits help keep it green and healthy:
- Regular mowing
- Occasional feeding with lawn fertiliser
- Clearing leaves or debris
- Checking for weeds early
- Watering during hot weather
With consistent care, your lawn should remain vibrant throughout the year.
Common Mistakes People Make When Laying Turf
Even though the process is straightforward, small mistakes can lead to long-term problems.
Avoid:
- Laying turf on dry soil
- Working on uneven ground
- Leaving gaps between rolls
- Not watering immediately
- Laying turf in extreme heat
- Walking on fresh turf
- Ignoring dips and bumps during preparation
Being cautious during installation saves you a lot of effort later.
Expert Help vs. DIY – Which Should You Choose?
While laying turf is manageable for many homeowners, others prefer the ease and reliability of hiring professionals.
This is especially true for large gardens, uneven surfaces, or when people want a flawless finish.
Professional installation offers:
- Faster completion
- Perfect levelling
- Reduced risk of long-term issues
- Clean edges and seamless joints
- Expert aftercare guidance
For homeowners searching for the best lawn turf layers near me, choosing an experienced team removes the stress and ensures the lawn thrives from day one.
And if you’re comparing options, many people in Essex choose Turf Supplies Essex for their affordability and high-quality natural grass turf installation services. Their installers are experienced, professional, and familiar with local soil conditions, which can make a noticeable difference in results.
Final Thoughts
Now that you understand how to lay lawn turf, you’re far better prepared to install a garden lawn that looks great and lasts for years. From clearing and levelling the soil to watering and aftercare, each step plays a significant role in the final outcome.
If you’re considering professional help, many homeowners prefer working with reliable turf layers in Essex to ensure perfect installation and long-term lawn health. And for those who want the reassurance of skilled hands, companies offering expert services—such as expert lawn turf installers near me—provide excellent support from preparation to final touches.
Whether you install the turf yourself or hire professionals, following this guide will help you achieve a greener, more beautiful lawn you can enjoy throughout the year.